Showing posts with label Man Cave. Show all posts

Forgotten Fridays: Paint Chip Art

Friday, August 9, 2013

Sooooo I meant to share this post a while ago... like a few months ago. I am a blogging slacker. 

This is the quickest and easiest DIY art piece I've made. 


Jon and I have a ton of empty walls. We'd love to throw up some pictures frames and art but since we need so many pieces of actual furniture any decorative wall stuff is low on the To Do List. So whenever possible I've made art pieces to fill up our walls. On the cheap of course. My favorite home bloggers at Young House Love recently published a book and in it was this art project. 

All I did was take some free paint chips, cut them up and glued them onto a piece of paper during my lunch hour at work.  Like I said, quick and easy. 

When we were at Home Depot picking out paint for our bookshelf I stuffed a whole of punch of green and yellow (Packers!) paint chip into my purse. I was a little embarrassed and kept an eye out for employees but no one said anything. I didn't even get an evil eye. I had to remind myself (and jon) that those are free! Plus I think all the money we spend at Home Depot gives me a little leeway to take 10 extra paint chips!

First I laid our all the paint chips and arrange them from light to dark in each color with help from my fellow crafty coworker. Then I used my little paper cutter (its tiny but useful) to cut the chips into thin strips. 
 

I wanted it to look like a color gradient and wanted it to resemble a chevron stripe. I used a ruler to line up the cut pieces.


I arranged them on two pieces of computer paper (green on one, yellow on the other). 


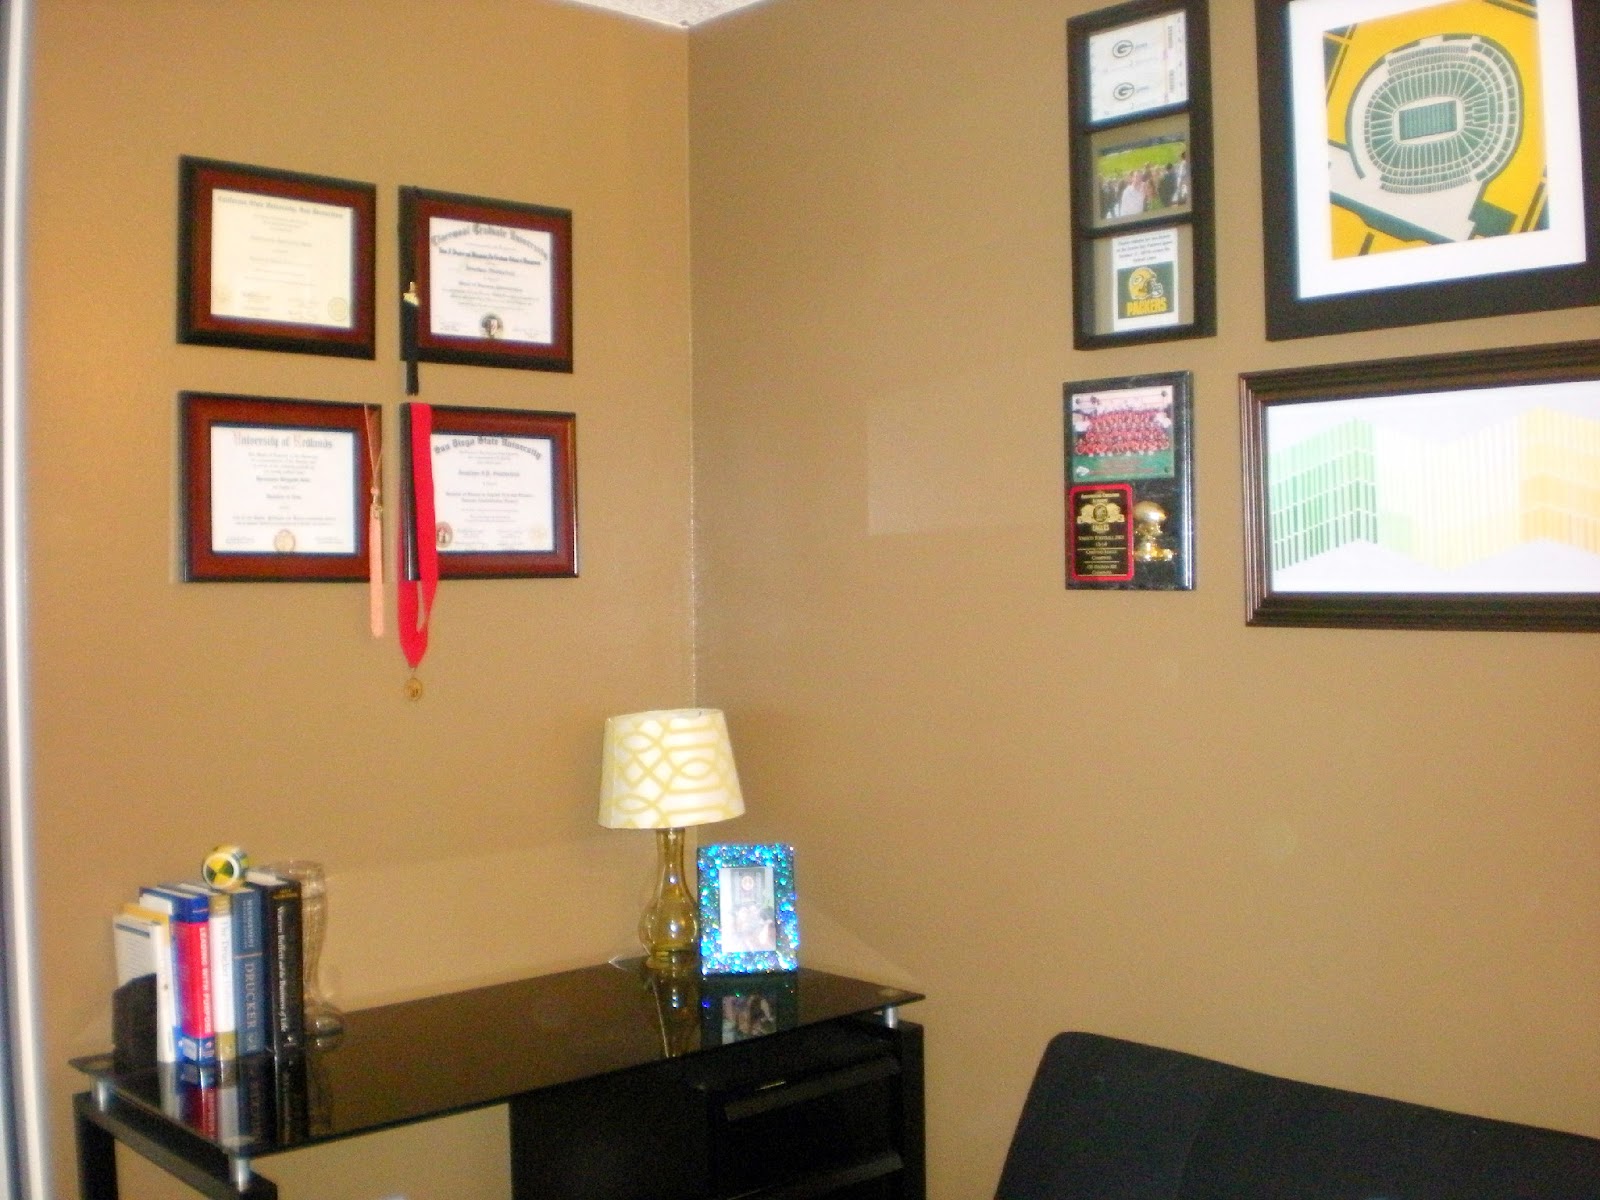
I purchased the frame from Ross for about $15 and trimmed up the computer paper to fit in the frame. 

Done. 

I loved this project because it was (almost!) free and easy. Its also something that could be adapted for anyone's preferences. You could do several colors (instead of two), change the shape and vary the thickness of the paint chips. If I could do it over again I'd used the back of the filler paper from the frame to avoid the ugly looking gap and little wrinkles in the paper. I also think the middle is a little to light and doesn't really show up on the white paper. If there is a next time I'd use a darker piece of paper. 

I'm sure one day I'll want to replace it but for right now it looks ok and goes with the Packers theme in the Man Cave. 

Ready For Guests

Friday, July 26, 2013

Jon and I are hosting one my roommates from college and her fiancé this weekend. Obviously I was excited at the prospect of having them stay with us and immediately said yes to the proposed stay. After I told Jon about it I thought "dude, I gotta clean out that room!" Because it looked like this....


I let that get way too out of control.


It all started when I found this awesome cabinet on Craigslist (thanks for your help dad!) I thought it would be perfect in that closet to hold all our books. We had an old bookshelf of Jon's in there but I felt like it took up too much space.The Craigslist one fit perfectly on one side of the closet so the other side could remain open for guests to utilize. One Friday morning (I don't work Fridays in summer) I moved and organized all the books in the new cabinet. I don't have a before photo but trust me its a big improvement.


The only problem was that I took everything out of the closet to do it. Hence the explosion of the stuff. I can't even blame Jon. I'm the one who removed all the contents and honestly the messier stuff was my craft stuff. In case you can't tell, I have a lot. I told Jon I'm not allowed to buy more stuff for awhile. Sorry Michael's!


I ended up organizing all my craft stuff into the rolling plastic compartment thing. I figure its low enough where guests can hang clothing without it getting in the way. Plus it has wheels so I can wheel it out when I'm working on project. But this is only a temporary solution. That thing is too old (I've had it since college!) and I'd like something that's sturdier since my craft stuff is heavy.

On the shelf is the gift wrapping stuff and some boxes of our personal mementos. Jon and I both have saved ticket stubs from our travels, cards from our families and random stuff thats too special to throw away but we don't really have a place to display it.

Once all the organizing was done (it took two days) I could finally clean and do all the things you do to get your house ready for guests. This part wouldn't have been so bad if I hadn't accidentally spilled glitter while organizing my craft stuff. Glitter is so hard to clean up. Even Poseidon had some glitter on him!


By the time you'll be reading this I'll be enjoying the weekend and the company of good friends. Probably with some type of adult beverage in hand.

The Most Expensive Things In Our Home

Thursday, June 20, 2013

Our previously blank area above the desk is now showing off our diplomas!


Yes, they are the most expensive things in our home. The retail price on those little pieces of paper is almost $250,000. Nope, that's not a typo. Almost a quarter million dollars went into our brains!

They'd just been filed away in the desk. Lame! We worked really hard to earn those so I really wanted to get them up on the wall. My parents had framed both of my degrees and had given them to me to have at work right after I finished my Master's. When Jon and I bought this place I took them home to display. I completely forgot about them until I found Jon's diplomas when we were cleaning out the garage. Yes, they were in the garage. Probably in this pile somewhere.


Since my parents had gotten the frames from Costco I was thinking that there was a pretty good chance they would have more. Instead they had some that were super similar so I bought those thinking we could frame the diplomas by his and hers. As soon as I got them home, I tried to slip Jon's diplomas in there but they were too big! By just a tiny bit (doesn't it always happen that way?). My mom suggested cutting the diplomas!!!! NOT going to happen. Jon would have a heart attack if I cut those up so I made color copies of them and cut up the copy.

That sat on the dining table for a week. That's our thing. Leave things out for a while until I feel like getting on it. Then I end asking Jon to help me do whatever it is that needs to get done. It took me forever to get our framed monogram done.

One night after work (just another exciting evening! Kind of like this one.) Jon and I finally got around to hanging them. We decided that a small framing grid would look best. I must have had Jon hold and it at a few different heights until I decided it was perfect. Then Jonathan hung them up.


And we hated them. Exactly the way we felt about the old ugly mirror in the half bath.

Top: My MPA from Cal State San Bernardino & Jon's MBA from Claremont Graduate
Bottom: My B.A. in History from the University of Redlands
 & Jon's B.S. in Business Administration (Finance) from San Diego State
Those frames are too small for the space. We'd prefer something bigger, maybe with a mat. I also think the color is too similar to the paint and it all blends together. They just look blah. They don't really stand out and look the opposite of impressive. Sooooo now I'm back to searching for four bigger and better ones. But you know its hard to find four matching of anything at Ross. In the meantime these will just remain as is.


Goes to show (once again) that not everything we do around here is a success. Remember Jon's battle with the sink, my stenciling debacle and the shutters? But it's still better than a big blank wall. At least those diplomas are up!

We are so Shelf-ish

Tuesday, April 16, 2013


Being newlyweds means that we have a ton of mismatching Ikea furniture. Obviously I’m trying to replace and upgrade ALLof our stuff but since we have been doing so much to the Man Cave Jon and I decided to get a new media stand. After our bed frame this is the first piece of furniture we’ve bought. 

The old one was too small and the TV sat way too low.


I had been lusting after one of those bookshelves all over Pinterest that are open and have different compartments. Thanks to Pinterest and my online shopping addiction I found this beautiful (and affordable!) one at Wayfair.com (my new favorite online store just in case you wanted to buy me something). 


The plan was to use as entertainment center but I don’t like when you can see all the cables so I thought it would be cool to cover the back with some painted plywood.


Once it arrived and Jonathan assembled the bookshelf. And it was Home Depot time (again) to get some plywood. They have prepared wood that just had to be cut to size. We selected Packers green paint and I painted the panels. Jon attached them to the back and we were done!


We chose Jonathan’s football helmet, a huge bottle of champagne, our favorite books that makes us look smart and fancy and favorite movies to display. Even though it’s the Man Cave, all of my Harry Potter books and movies and Law and Order: SVU DVDs are on it. Thanks Jon!

Funny story: When Jon was nailing the panels to the bookshelf he kicked me out of the Man Cave because I was telling him (really annoyingly I’ll admit) how I wanted it done. I had to pound on The door for him to let me back in. He has no recollection of the event but I swear that it happened.

Initially we were going to put all of our DVDs on the shelf but we have way too many. Our solution was to build shelves in the closet. The idea was mine and the execution was Jonathan. So does that mean the solution is mine? I just want to give credit where credit is due. ;) 


The closet in this room has a little cut out that’s about 11 by 11 inches. You can’t hang clothes there and that width works really well for DVDs or books. Jon measured and figured out how many shelves we could install. Back to Home Depot. We purchased pretreated white boards (the kind that are made for closets), had the lovely folks at Home Depot cut them to size and used little screws to attach the brackets to the wall and wood. We ended up making trips to two different stores because we cleaned them out of shelf brackets.

Here is the end result:

Total there are 10 shelves and its holding the majority of our DVDs and Jon video games. Best use of an awkward and tiny space.

Now please ignore our mess in the rest of the closet. Thanks!


Jon 1, House 0

Thursday, April 11, 2013

Leaky sinks seem to be our thing. In the short time we've lived in our home we've had two leaky sinks (you can read about our stupid kitchen sink here) and one leaky hose spout thing. Is that what its called? I should ask Jon.... But our first leaky sink run-in was in the half bath.

The Man Cave bath may have been the first room makeover we did but our half bath downstairs is the room we've done the most work in. It's right next to the front door, a closet, and our stairs. This means it was built into the smallest space possible. We used me as a unit of measurement (that's how we roll in this house) and since I can't lay down completely in it, I would guess it's only about 3 and a half feet by 4 feet compared to my 5 feet height. Tiniest bathroom ever.

The vanity in the room was way way way too big for the space and I felt like the door was going to hit me in the back every time I washed my hands in there. If it was too cramped for me I can't imagine how everyone else felt using it. Thinking of ourselves and guests (and future home buyers!), Jon and I decided to replace it with a pedestal sink.

wouldn't a pedestal sink look so much better?
We checked the selection at Home Depot and Lowe's and Jonathan realized that it wouldn't be as easy as he initially thought. Once he removed the old vanity and consulted with Google he determined that installing a pedestal sink would involve opening up the wall and doing some major changes to the pipes.

See how small the room is? 
I was against putting a hole in our wall for something that we didn't absolutely have to do. Its a room we hardly use and its not like this is our forever home. Jonathan was all about opening the wall. Why? Because of the piece of tile sticking out of the wall. Yes, some previous owner had stuck a long piece of tile IN THE WALL to tilt the water shut off valves up. Behold the photographic evidence:

Look right behind the silver oval knob
Let's pause for a moment and shake our heads in disbelief. Done? Ok.

Jon wanted to redo whatever had been done previously because he figured that it probably wasn't done right. I thought that it was weird but it didn't seem like anything was wrong so why make a mess? We had already vetoed the pedestal sink idea. After a loooong discussion Jon pulled the piece of tile from the wall and left it as is. Don't worry, everything seems to be okay back there... Fingers crossed!

Back at Lowe's (Home Depot let us down, I took it pretty hard) we finally bought a new vanity and sink. The new one was just as long as the old one but not as wide so we gained about 4 inches in between the sink and the door. The only problem was the knobs on the water shut off valves were oval and long which prevented the new vanity from sliding up against the wall on the right side of the cabinet. Jon said he would replace the knobs with smaller new ones and that would solve the problem. Not so much.

Not lying when I said small!
He got to work switching out the knobs and it went like this: Jon replaces the knobs. Water back on. Drippity drip drip. Water off. Tighten stuff. Water back on. Leak leak leak. Water off. Home Depot. Repeat once.

Jonathan says:
"If I learned anything, replacing a compression ring can be a pain the ass. For those who don't know, a compression ring fits around the copper water pipe and is the go between for the water shut off valve at the end of the pipe and the nut that holds it. Well, after a compression ring has been in place for years... it doesn't want to budge. The only way to get it off is to cut the copper pipe behind the ring (easy way) or very slowly saw a groove into the metal ring until you can fit a flat head screwdriver into said groove and essentially twist the driver to snap the ring (hard way). Well, we didn't have any spare length on the copper pipes, so I had fun with the hard way."

At this point its almost midnight. Our conversation goes like this: Jon- "I don't know if I can fix it. I'm just going to put a bucket underneath the spout." Me- "Dude, there's a lot of water coming out. Don't you think the bucket will fill up while we're at work?" Jon- "Fine. I'll shut the water off." Me- "I still have to shower!"

Half an hour later I hear "JON 1, HOUSE 0! I FIXED IT BABE!"

I got to shower that night.

Our First Project

Sunday, April 7, 2013


The guest bath (the one off the ManCave) was actually the first room we redid. It seems like such a strange place to start considering we don’t really use it. I’d like to say that I was trying to get everything ready for our eventual guests but in actuality we started in that room because it didn’t really need a whole lot. Thanks to our awesome friends and family we got most of the stuff for that room for our wedding. All we really had to do was paint and add some shelves.

Thanks to one of those Design Seed color boards on Pinterest I found the color palette we I wanted to use in the bathroom and the Man Cave. 


Since the entrance to the bath is inside the Man Cave it only makes sense that the colors should go together. I thought i twas going to be really hard to convince Jon to go with such a bold color but I was so wrong. In fact he picked the shade of navy we went with. 


Since this was our first paint job this is when we began to notice that the paint in all the rooms was badly done. I didn’t think it was possible to mess up paint this much but it is. The mirror, light fixture, sink, towel bar, outlet plates and bathtub all had dried paint on them. Lovely. It took awhile but we were able to scrub a lot of it off. We didn’t really want to replace anything major in here so we really tried to remove as much paint as possible.

We taped off everything and got to painting. I think this is the only room in the house that I actually helped paint. I use the word helped loosely because I’m not sure I was that helpful. If I remember correctly Jonathan had to go over my strokes… but it’s the thought that counts, right?


Fun fact- it’s really hard to paint the area behind the toilet. It’s also hard to paint up to the ceiling in the tub. Even with a ladder.


The paint in here is not even close to perfect. After we were “done” we knew that we’d have to go back and fix the lines on the ceiling. It’s been a few months and we still haven’t done that. We’ll get around to it one day. Maybe.

Once the paint dried Jonathan installed two shelves above the toilet for me. After he did his thing I was able to do mine. I hung up the shower curtain, put up the towels and made the shelves look pretty. It’s really hard to think of decorative stuff to put in a bathroom. I’ve never noticed what other people have in their bathrooms and I couldn’t really find anything so I made my own. The weirdest thing in there? The wine bottle thing. I stuck some curly willow from our wedding flowers into an empty glass wine bottle from our rehearsal dinner. We get tons of compliments on it so it must be nice. And it was free and easy. The round medallion metal thing is a recent addition.  I’m always looking for new house stuff!


I LOVE the shower curtain.


My favorite thing in the bathroom is the wee wee dance (what else would you call it?) canvas. Why? Because I made it and it's so funny.


My awesome friend Amy and her husband cut the silhouette on her cricut and I used a paint pen to color in the people. This is the view from the toilet. Totally appropiate right? 

Inspried by this version on Etsy
I wish I had a picture of the before when it was all white. Paint, shelves and one weekend made a humongous difference. Now for some guests!

Manly Makeover

Tuesday, April 2, 2013

When we first moved in the extra bedroom was a catchall. We just tossed stuff in there and closed the door. However, being the awesome (and modest) wife that I am, Jon & I decided to turn that room into Jon's man cave. See I really don't mind football, in fact I've become a full fledged Packers fan but I HATE the Lakers. And I don't really want video games in our bedroom or living room SO Jon gets a man cave. Maybe in our next home I'll get a craft room where I can watch Law and Order: SVU marathons. A girl can only hope....

All the walls in the house are terrible. Whoever painted in here last just threw paint up on the walls. I don't think they covered anything. There's paint on the fixtures, mirrors and trim. The last couple of rooms we've done haven't been too bad with the gross old paint but the man cave was in rough shape. The outlet plates were painted to the wall. We ended up cutting them off the walls. See that huge chunk of dried paint? Ugh.


Luckily the rest of the painting on Saturday went by pretty quickly. Thanks Dad & Erick!


Sunday morning Jonathan and I replaced all the outlet plates with new ones and moved all the furniture back. At this point I was a little concerned the color was too dark for all the black furniture in the room but figured I'd better wait until all the artwork was on the walls before totally freaking out and telling Jon we needed to change something. I was off work today (thanks Cesar Chavez!) and decided to try to hang the frames myself. When I told Jon what my plan for today was he seemed a bit skeptical but I assured him if it was too heavy or something I'd wait for him instead of poking a bazillion holes in the wall. 

I have been slowly accumlating manly artwork. Which is harder than it sounds. We wanted cool, not tacky and I think we chose pretty well. I bought two beer related prints and added some Green Bay Packers inspired pictures and art. My personal favorite is a green and yellow map of Lambeau Field. I also painted an old football helmet picture collage Jon's dad gave him years ago white. 

I laid everything out on the futon and then just started eyeballing it on the wall. I started from the middle and worked my way out. I didn't measure at all. I just went by what I thought looked good. 


Jonathan wasn't on board at first but I think it's because he was seeing it via text and it just looks so much in better in person. 


I LOVE the way it turned out. There's only picutre that's missing and sadly its my favorite. The frame came with the little hook to hang it but it's not attached to the actual frame. I was afraid of denting it or somehow ruining the glass (because that's totally somethng I'd do) so I left that one for Jon to do. Hopefully he'll hang it tomorrow and the man cave will be almost done!

Isn't it pretty? But in a manly way, right? 


Wrench in the Shower

Saturday, March 30, 2013

HUGE thank you to my parents and brother for coming over to help us Jonathan paint the Man Cave today! Mom and I especially enjoyed our mini shopping trip. Yeah... we went shopping while the men were hard at work. Our intent was to go on a food run but we can't help a bargin. I did buy Jon a cool motorcycle though. See, I was thinking about him ;)


Apparently painting wasn't enough for Jonathan today. After everyone had left and he was washing away all the paint he asked me to bring him a wrench. While he was in the shower. The showerhead was loose and he figured that was a good time to fix it. Strange timing but no time like the present I guess. 


He also fixed a crooked/loose cabinet door in our bathroom. He was in the home improvement zone today. LOVE IT. 

Tomorrow we'll show you how the Man Cave turned out. We're too tired to do it tonight!